Domodrive is a home-automation scenario for Home Assistant. You draw schedules of actions on shutters and lights, validate them, deploy them over a date range. The founding use case fits in one sentence: leaving for a two-week holiday with a believable presence simulation.
Four articles have already been devoted to the subject. They tell the why and the how it is built. What was missing is the rest: how you install it, where the documentation lives, and what you need to know before running the first command. That is what this one covers, and it also serves as the single entry point to everything else.
The four previous episodes
In the recommended reading order:
- Simulating presence during a holiday, without writing a line of configuration — the need, the complete journey, and what the application refuses to do.
- Inside the engine: architecture, data and invariants — four layers, one dependency rule, and invariants held by the database rather than by vigilance.
- Writing into Home Assistant without ever touching a shutter — three service calls and not one more, the safeguard, and the YAML actually produced.
- The technologies, and why those ones — the fifteen production dependencies, one by one.
If you only read one, take the first: it shows what the application does. The other three explain how it does it.
What 1.0.0 brings
The code has not changed much — it was already covered by dozens of tests. What changes is everything around the code:
- a published Docker image,
suntux57420/domodrive:1.0.0, also available as:latest; - ready-to-apply Kubernetes manifests, in
deploy/kubernetes/; - complete documentation in thirteen pages, published on the wiki (wiki.ev1.fr);
Installing with Docker
The shortest version, just to try it:
docker run -d --name domodrive \
  -p 8000:8000 \
  -v domodrive-data:/app/data \
  -e SECRET_KEY="$(python3 -c 'import secrets; print(secrets.token_urlsafe(48))')" \
  -e DATABASE_URL="sqlite+aiosqlite:////app/data/scenario_studio.db" \
  -e HA_BASE_URL="http://homeassistant.local:8123" \
  -e HA_TOKEN="<long-lived token>" \
  suntux57420/domodrive:1.0.0
Then http://localhost:8000, account admin, password admin1234 — which the application asks you to change on the very first login, and about which it keeps complaining through a red banner as long as it is still the default value.
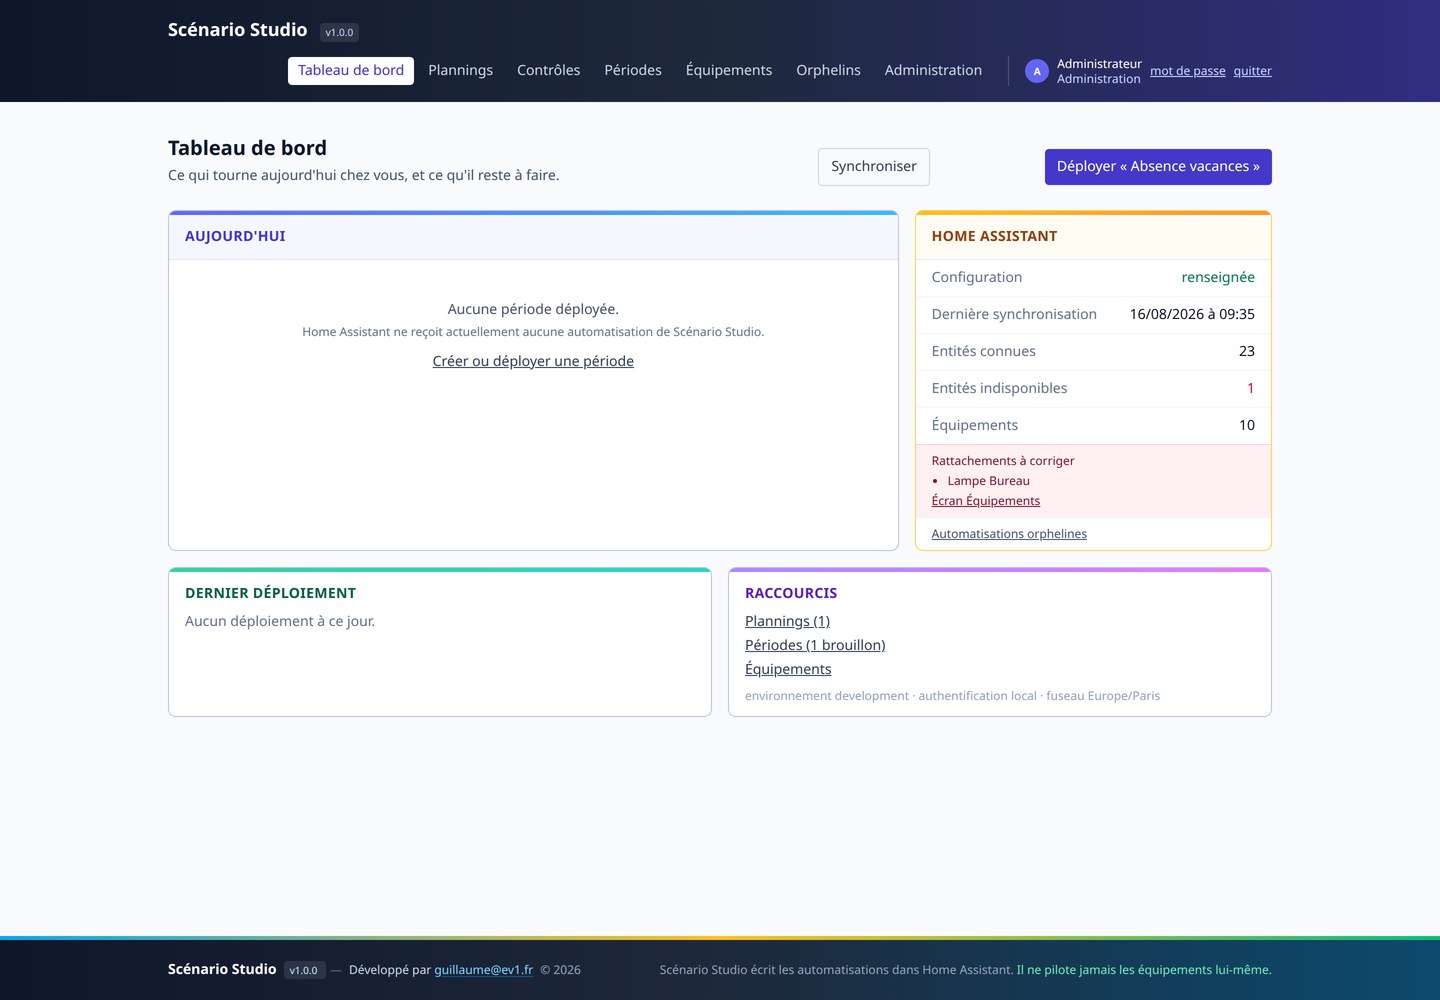
The dashboard on first launch: nothing is deployed yet, the link with Home Assistant is established and inventoried, and the application states in its footer what it will never do — drive the equipment itself.
Two pitfalls that cost an evening
Four slashes, not three. sqlite+aiosqlite:////app/data/… points to the absolute path /app/data/…. With three slashes, the path becomes relative to the working directory: the database is no longer in the volume, and it disappears when the container is replaced. You only notice at the first update, which is to say at the worst possible moment.
A container's 127.0.0.1 is the container. If Home Assistant runs on the same host, you need host.docker.internal in HA_BASE_URL, and the matching extra_hosts entry on Linux. The repository's docker-compose.yml already contains it.
What the volume holds
Everything that must survive the replacement of the container lives in /app/data: the SQLite database, the settings.json settings file — including the encrypted Home Assistant token —, the backup archives, the application log, and the update snapshot when there is one.
It is therefore the only directory to back up.
On Kubernetes
The manifests are in the repository: namespace, ConfigMap, Secret template, PVC, Deployment, Service, Traefik Ingress, and a kustomization.yaml to apply the whole set.
kubectl apply -f deploy/kubernetes/00-namespace.yaml

kubectl -n domodrive create secret generic domodrive \
  --from-literal=SECRET_KEY="$(python3 -c 'import secrets; print(secrets.token_urlsafe(48))')" \
  --from-literal=HA_TOKEN="<long-lived token>"

kubectl apply -k deploy/kubernetes/
Two choices deserve to be spelled out, because they are surprising at first glance:
replicas: 1. On SQLite, two pods would write to the same file. To scale up, you first have to move to PostgreSQL — the administration screen copies the data and tests the target before switching over — and only then increase the number of replicas.
strategy: Recreate. With a ReadWriteOnce volume, a rolling update would deadlock: the new pod would wait for a volume the old one still holds. Better to own that explicitly than to discover a frozen rollout.
The three probes point at /health, which answers without authentication and exposes no secret. The startup probe tolerates one minute, the time it takes for the migrations to run on a fresh database.
The documentation
The documentation is published on the wiki: overview, Docker installation, Kubernetes installation, configuration and options, authentication and roles, getting started, schedules, control routines, periods and deployment, administration, operations and troubleshooting, technical reference.
It is illustrated with screenshots produced on a demonstration dataset. The internal simulator stands in for the Home Assistant instance.
Everything in one place
- Complete documentation — thirteen pages, from the first
docker runto the data model. - Docker image —
suntux57420/domodrive:1.0.0and:latest. - Project sheet — the context, the choices, the approach.
- GitLab repository — private repository, access on request.
And the four articles in the series, listed above, for the part that is not in the documentation: the reasons.
What comes next
The next chapter is already written in deploy/kubernetes/: running Domodrive on the house's k3s cluster, and the move to PostgreSQL.
Until then, the image is public, the documentation is online, and one command is enough to try it.